Smart business owners know that lead magnets like ebooks and PDFs are a great way to capture leads, grow your mailing list, and follow up with visitors long after they leave your website.
That seems great, but what about actually designing professional-looking lead magnets that people will WANT to download? That just sounds intimidating.
Maybe that’s why so many website owners hire a designer to create lead magnets for them. While this can give great results, it’s not practical if you have a smaller budget or want to maximize your ROI (return on investment).
Wouldn’t it be easier if you could just create the lead magnets yourself?
In this article, we’ll share our step-by-step guide to creating lead magnets that convert, based on the lessons we’ve learned from making our own lead magnets.
We’ll cover everything from creating ebooks to resource guides, lookbooks, and other downloadable resources without needing any design or coding skills.

Avoiding The Lead Magnet Money and Time Pit: How to Get Real Return on Investment
Lead magnets like ebooks, email templates, and other downloadable files open a channel of communication between you and potential customers. You can continue using this channel long after they’ve left your website.
But what if you’re not a designer? We’ve spoken with a lot of WordPress users who feel like they will need to pay someone to create professional designs.
Unfortunately, this can be pretty expensive for small business owners. In fact, this approach means you lose money before you’ve even created your first lead magnet.
Even if you do have the marketing budget, getting a designer up to speed takes time. You need to find the right person, explain what you want, review their work, provide feedback, and check their edits – that’s all time that you could spend growing your business.
That’s why we want to show you how to create lead magnets yourself.
With a lead magnet tool such as Beacon, you can do exactly that. Simply choose a ready-made template, add your content in the user-friendly editor, and publish your lead magnet – it’s as easy as that.
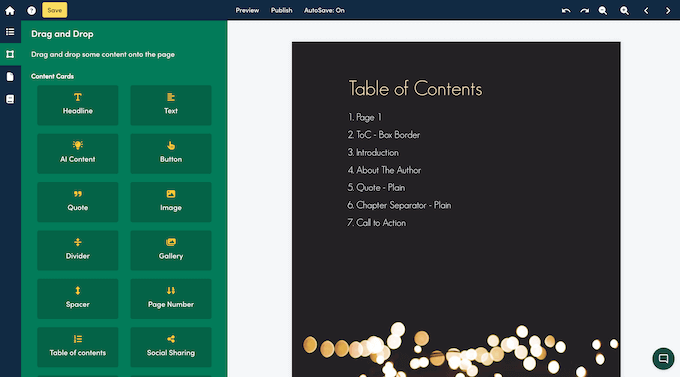

Even better, when you create a lead magnet yourself, you can edit it at any point.
Need to update an old statistic? Want to add some bonus content? Planning to put a fresh, holiday spin on an older lead magnet? Just open it in your lead magnet builder and make those changes yourself.
Ready to start capturing emails and leads right now? In this step-by-step guide, we’ll show you how to create all kinds of lead magnets, including ebooks, checklists, video lookbooks, resource guides, and much more.
Here are all the steps we’ll go through in this guide:
Step 1: Choose the Right Lead Magnet Tool
The first step is choosing the right lead magnet builder.
At WPBeginner, we’ve been growing our email list with lead magnets for years and have tried all kinds of tools in the process. As you’ve probably already guessed, we believe that Beacon is the best lead magnet builder we’ve ever worked with (if you want to learn more, then we cover this in detail in our Beacon review).
We love how Beacon lets you create all kinds of lead magnets such as ebooks, resource guides, checklists, email templates, and video lookbooks.
This is a big win, as in our experience, every lead is looking for something different. By offering a range of lead magnets, you stand the best possible chance of capturing that lead.
Beacon is also easy to use, comes with a ton of ready-made templates, and can convert your existing blog posts into beautiful lead magnets with just a few clicks.
In terms of saving money, Beacon has a ‘free forever’ plan that lets you create 1 new lead magnet every single month, with unlimited options.
Simply head over to the Beacon website and create a free account to get started.
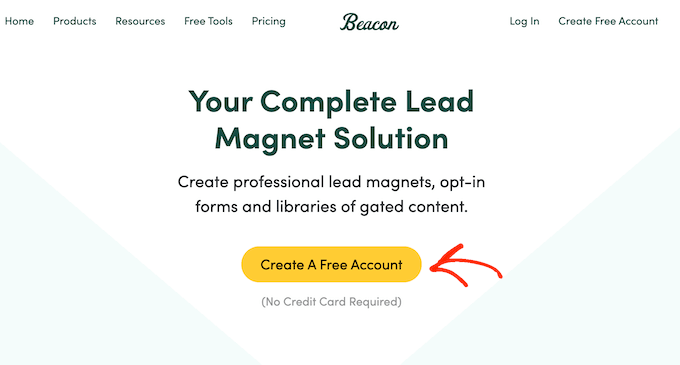

With that done, just log in to the Beacon dashboard, and you’re ready to create your first lead magnet.
Step 2: Choose Your Lead Magnet Format
To get started, you need to click the ‘Create New…’ button in the top-right corner. Then, select ‘Lead Magnet.’
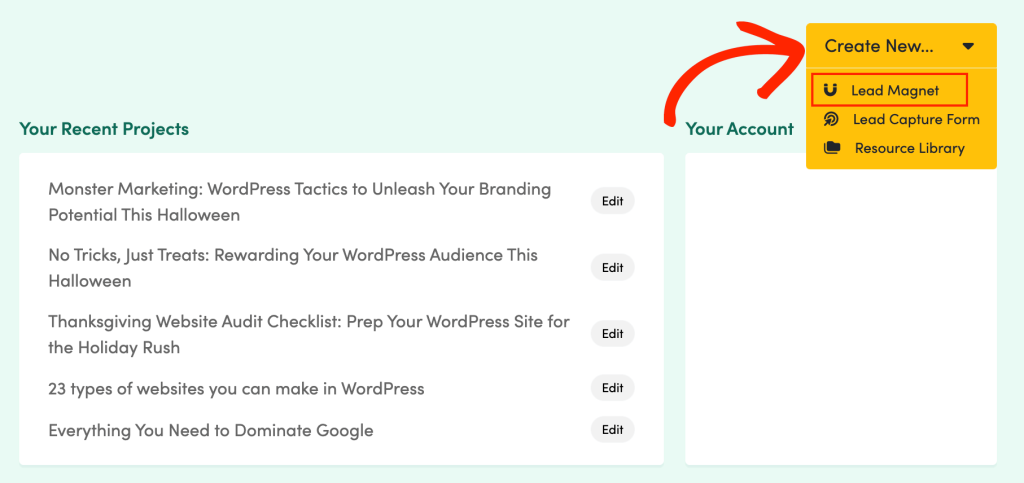

Beacon will now show all the different types of lead magnets you can create.
No matter what option you choose, Beacon has a range of ready-made templates within that category. All these templates are fully customizable, so you can fine-tune them easily in Beacon’s drag-and-drop editor.
Throughout this guide, we’ll be creating an ebook. However, the steps will be largely the same no matter what type of lead magnet you create.
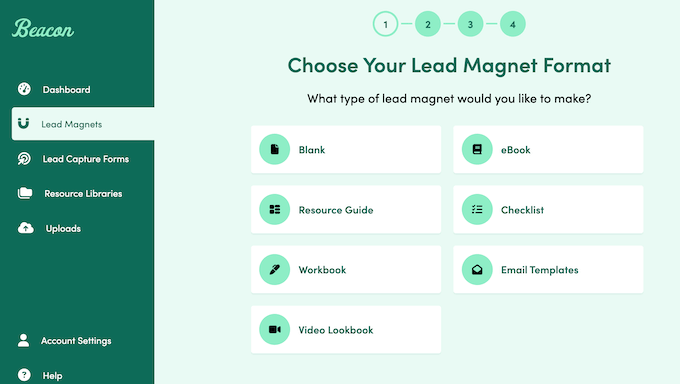

To help you choose the right format for your audience, let’s quickly run through all the different lead magnets you can build using Beacon:
Workbook
Want to help your visitors work through a particular activity? Workbooks typically contain a series of tasks or questions, with space for the reader to add their answers.


Workbooks are more interactive than other lead magnets, so they’re a powerful way to engage with potential leads. For example, if you’re a life coach, then you might create a workbook where leads can plan their meals or record their daily exercise.
Video Lookbook
Video lookbooks let you present one or more videos to visitors, in a nice layout.
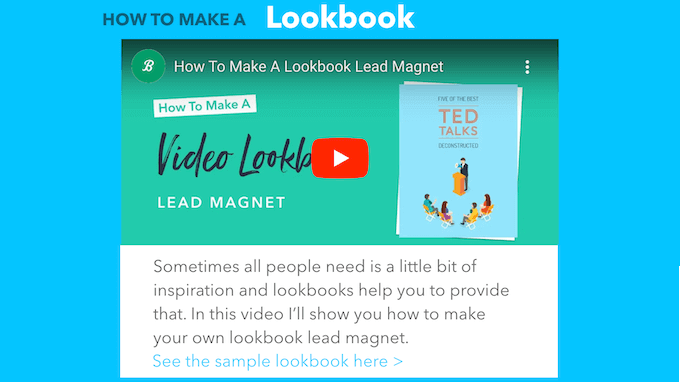

You can also add text, images, quotes, galleries, and other content to provide additional context or information.
Video lookbooks work particularly well if you want to inspire or motivate leads by sharing your brand aesthetics. In this way, you can use lookbooks as a catalog, showreel or even a mini fashion show, tailored to your specific offerings.
eBook
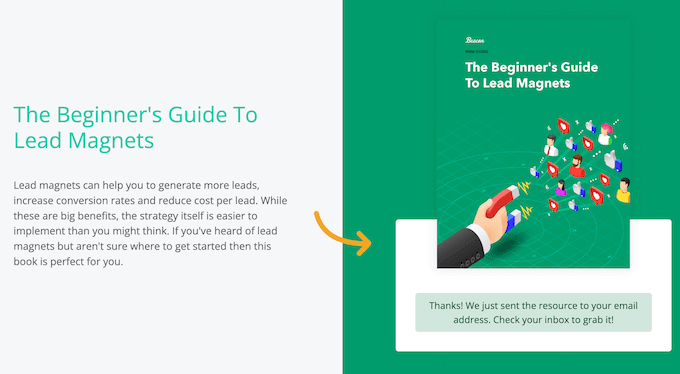
eBooks are a great way to share detailed information on a specific topic, in a nicely-organized format.
For example, if you run a financial website, then you might create an ebook where each chapter deep dives into a different money-saving strategy.

Resource Guide
A resource guide is a collection of recommended items, such as books, digital downloads, apps, or even physical products.


Continuing the financial theme, you might create a guide that lists the top 10 must-read finance books to help the reader build wealth.
Checklists
Need to share actionable tasks? Then a To Do list or checklist may be the answer.
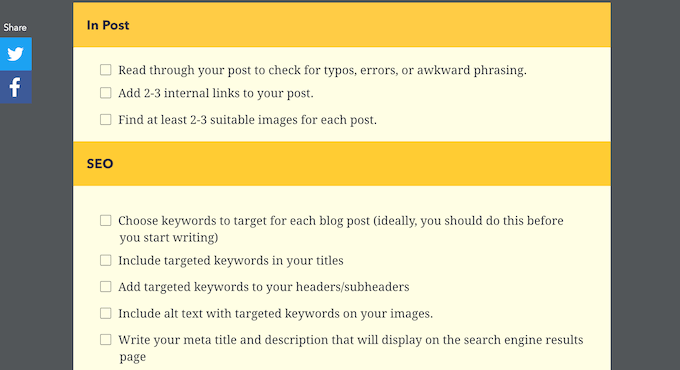

These are similar to our SEO audit checklist or our eCommerce launch checklist but formatted as a file that the reader can download and keep forever.
Email templates
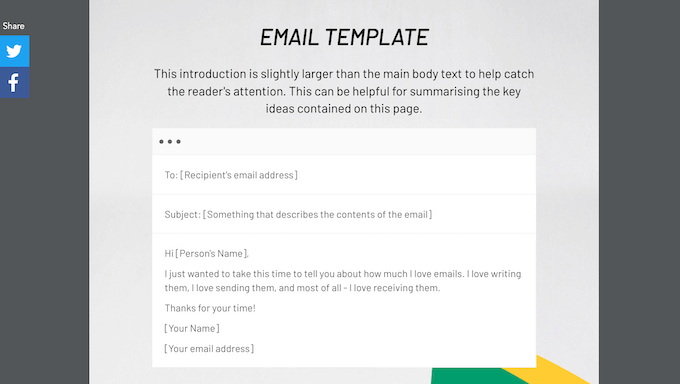
Want to teach your audience how to communicate better? Beacon lets you share sample email templates so leads can use them in their own campaigns.

Blank
Want to create something completely different?
Beacon has a ‘Blank’ category that lets you start with a clean slate. This may also be a good option if you have very particular design requirements.
Know what kind of lead magnet you want to create? Then go ahead and select that option in the Beacon dashboard.
Step 3: Choose a Template
After choosing a format, Beacon may ask whether you want to import content from your WordPress blog or website. This is a great feature, especially if you want to create a library of lead magnets, fast.
Since it’s such a useful feature, we’ll be covering it in detail at the end of this post. However, to keep things simple just click ‘Skip’ if you see this message.
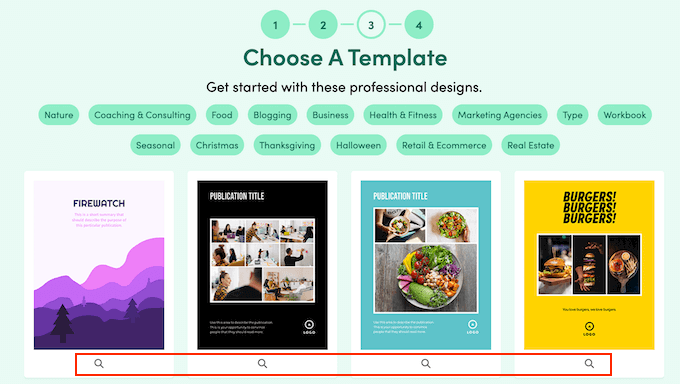
With that done, Beacon will show all the templates within your chosen category. While it’s easy to customize these designs, choosing a template that closely matches your vision will save you a ton of time.
To preview a template, go ahead and click the small magnifying glass icon beneath that template.

This opens the design as an overlay.
If you don’t want to use the template, then click ‘Close.’
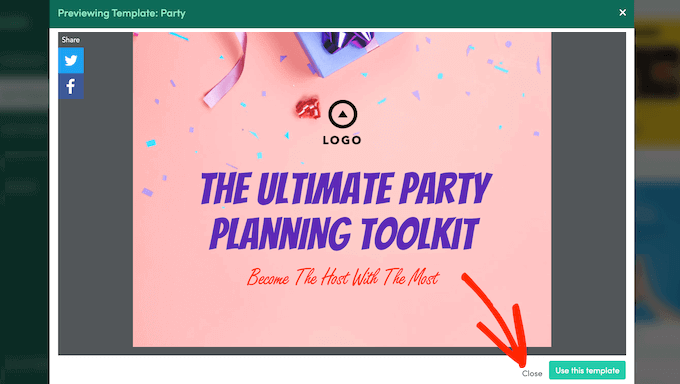

Simply repeat these steps until you find the design you want to use. With that done, click on ‘Use this template.’
Step 4: Give Your Lead Magnet a Name
With that done, you can type in a name for your lead magnet. This title will represent the lead magnet in your Beacon dashboard, so it’s a good idea to use something descriptive.
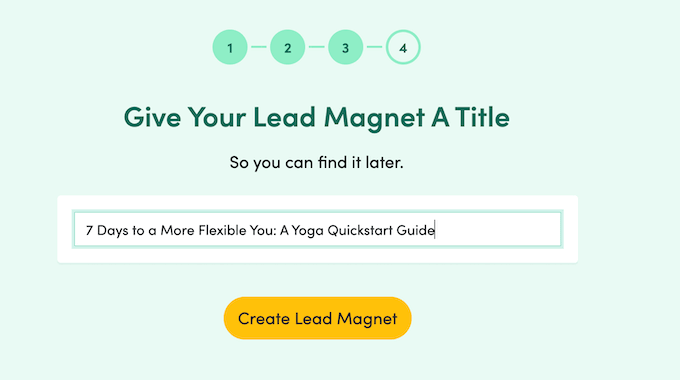

After typing in the title, click on ‘Create Lead Magnet.’ Beacon will then generate a lead magnet using your template and open it in the user-friendly editor, ready for you to customize.
Step 5: Customize the Default Template
Beacon’s simple drag-and-drop builder shows a live preview of your lead magnet to the right. On the left is a menu showing all the different pages that make up your lead magnet.
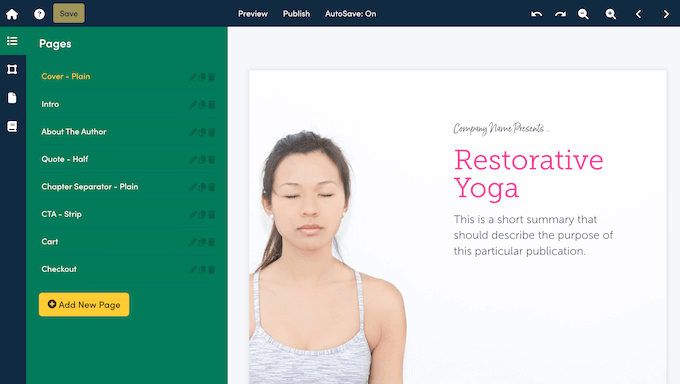

Depending on the template, your magnet may already have multiple different pages.
To preview a page, simply click on its title in the left-hand menu.


To start, we recommend clicking through the different pages to see exactly what’s included in your design. After that, you’re ready to start customizing those pages.
All of Beacon’s templates come with built-in cards, such as Headline, Gallery, or Text. To add your own content or styling, simply click to select the card in Beacon’s live preview.
The left-hand menu will then update to show all the settings for that particular card. For example, if you select a Text block then you’ll see options to change the font size, text color, and spacing.
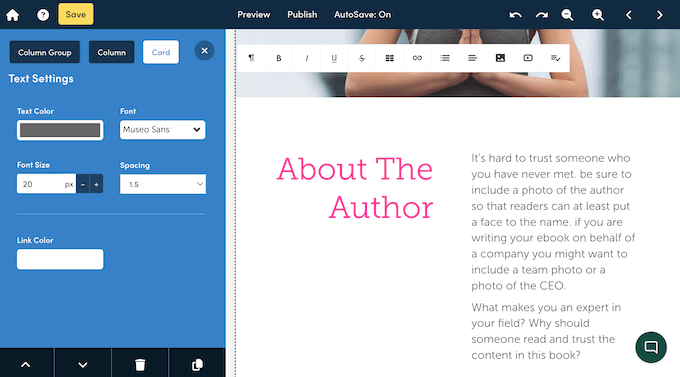

If you select a text-based block, then you can also delete the placeholder text directly in the live preview. You can then replace it with your own messaging.
Images are a great way to catch the reader’s attention and can make them want to continue reading your lead magnet. That said, most templates come with placeholder images.
To replace these, simply click on the Image or Gallery card. Once again, Beacon will show all the settings you can use to customize that card.
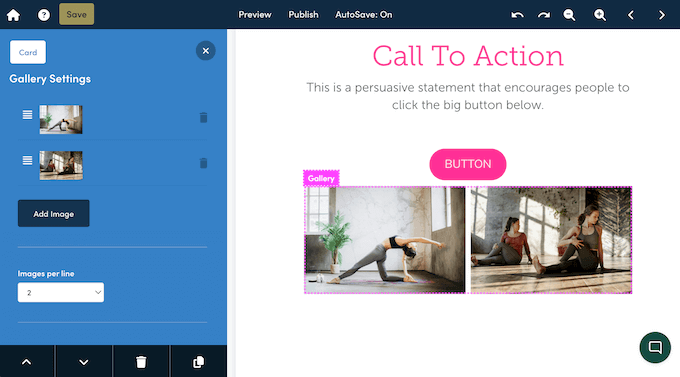

To replace a particular image, just click on its thumbnail in the left-hand menu.
You can then click on the ‘Upload’ button, followed by ‘Upload Image.’


With that done, choose the image you want to use instead.
If you’re editing a Gallery card, then you can repeat these steps to replace multiple placeholder images. You can also click on ‘Add Image’ to add more content to the gallery.
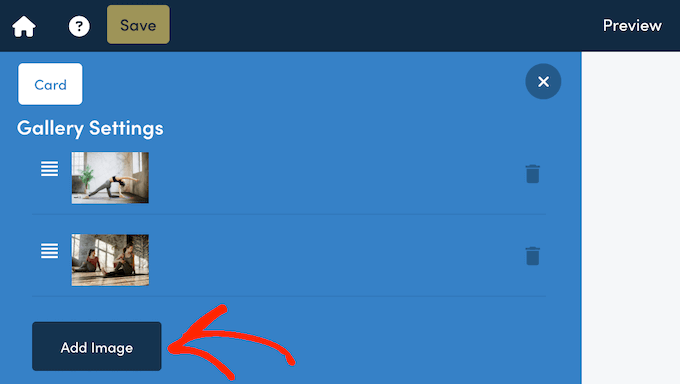

Simply repeat these steps to customize all the cards that come with your template.
Step 6: Delete Unwanted Content
Often, a template will have content you don’t want to include in your lead magnet. This could be an unnecessary card or even an entire page.
Thankfully, it’s easy to delete content in Beacon.
To remove a card, simply click to select it in the live preview. Then, click on the ‘Delete This Card’ button at the bottom left.
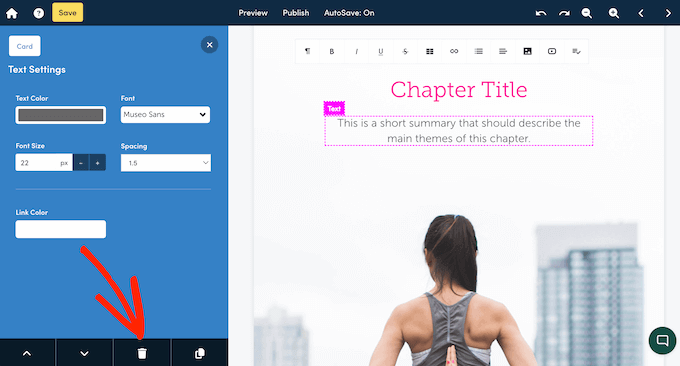

Do you want to make a bigger change and delete an entire page instead?
In the left-hand menu, simply click on the ‘Pages’ tab.
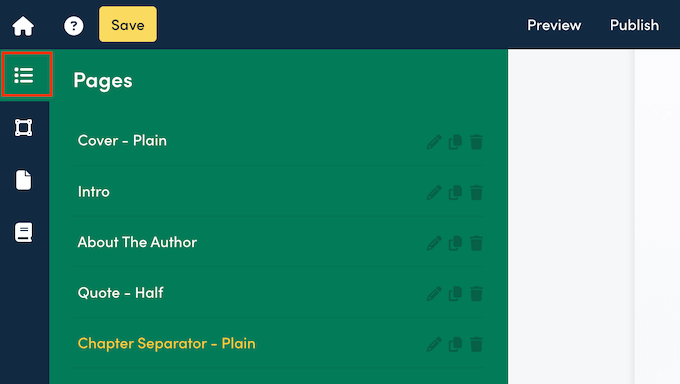

Then, find the page you want to remove.
You can now go ahead and click on its trashcan icon.
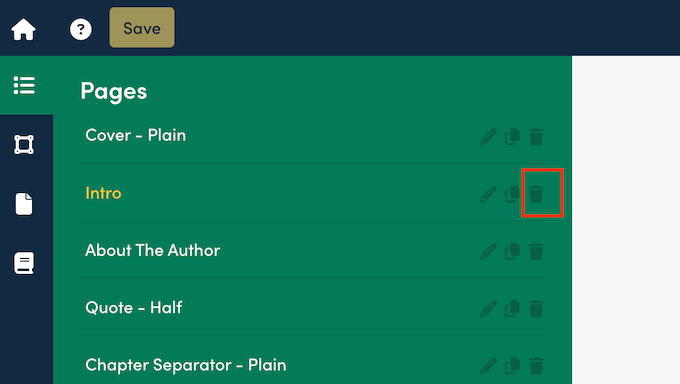

Beacon will ask whether you want to permanently delete this page.
If you’re happy to go ahead, then click on the ‘Delete’ button.


Step 7: Add More Pages
Want to add more pages to your lead magnet? Just click on the ‘Pages’ tab and then select the ‘Add New Page’ button.
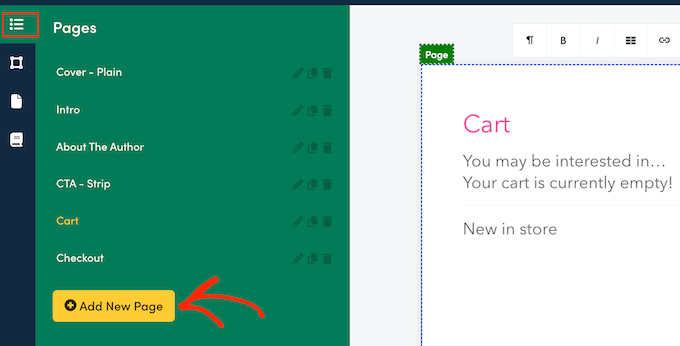

To save time, Beacon has a range of ready-made page templates that you can use.
While you can customize these templates, choosing one that closely matches your desired end result will save you a ton of time.
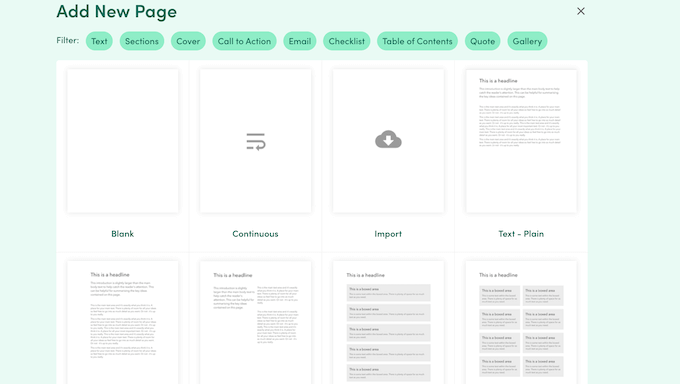

Alternatively, you can start from scratch by selecting the ‘Blank’ template.
No matter what design you choose, Beacon will add that page to your lead magnet.
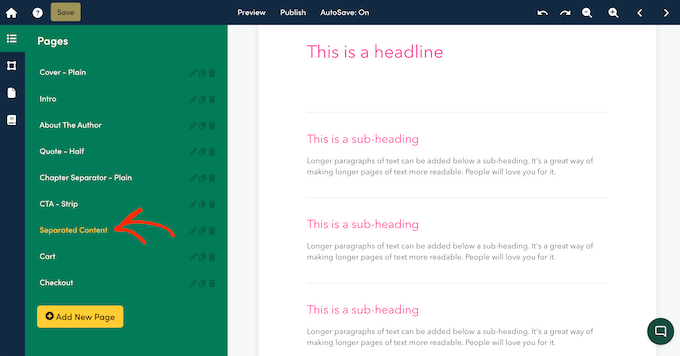

Want to change where the page appears within your document? Then you can simply drag and drop that page into a new position in the left-hand menu.
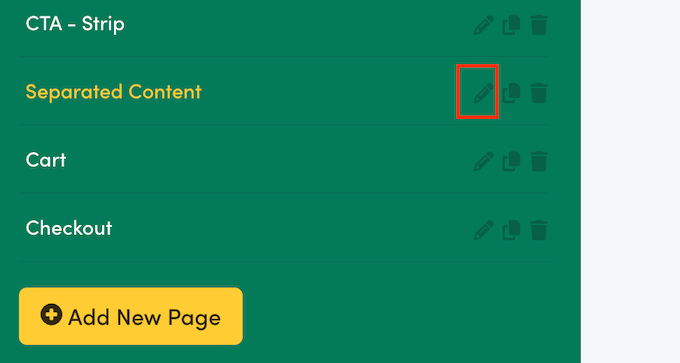
After that, you’ll typically want to give the page a title. To do this, click on its ‘Rename page’ icon, which looks like a small pencil.

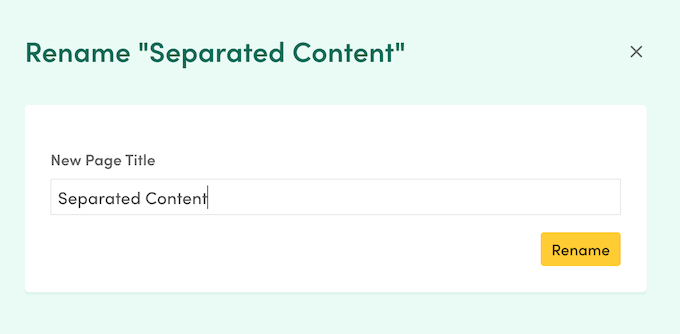
On the next screen, type in the title you want to use.
You can then click on the ‘Rename’ button.

Finally, you may want to change the page’s background color, add a background image, hide the header, or make similar changes.
To do this, click the ‘Page Settings’ tab in the left-hand menu.
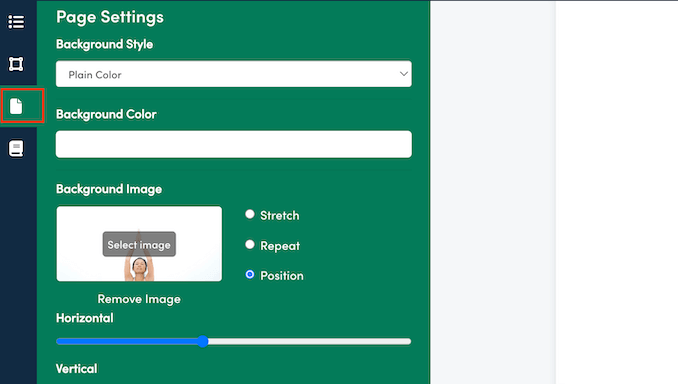

Here, you can change the document’s background style and gradient, add a background image, change the margins, and toggle the headers and footers.
Step 8. Add More Cards
As we already mentioned, Beacon’s templates come with some built-in cards. However, you’ll typically want to add more cards to your design.
To start, select the page where you want to add those cards. Then, click on the ‘Content Cards’ tab in the left-hand menu.
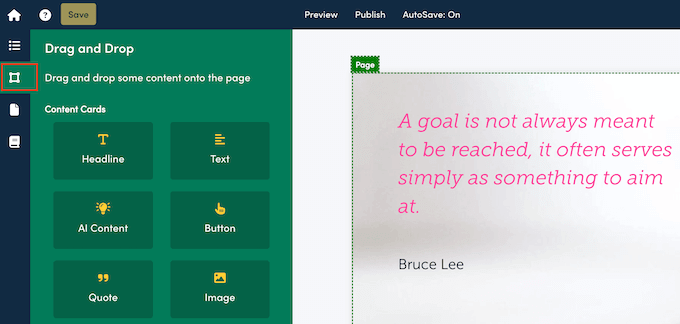

Beacon will now display all the cards you can add to the page, such as Text, Headline, Button, Quote, and Social Sharing. There are also cards that can help you create a nice layout, like Dividers and Spacers.
When you find a card you want to use, simply drag and drop it onto the live preview. You can then change the card’s settings in the left-hand menu or type in some text if you’re adding a Headline or similar card.
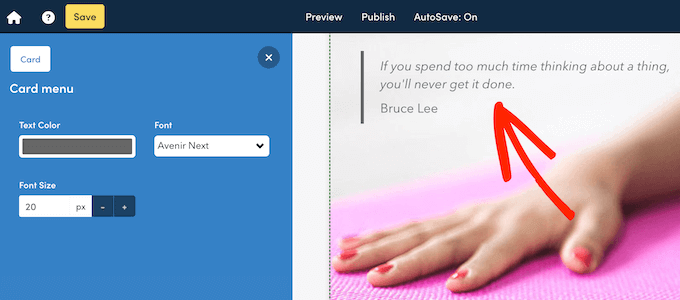

The ‘Content Cards’ tab also includes containers, such as Columns and Strips. These help to organize your cards, such as arranging them into multiple columns.
To use a container, once again just drag and drop it onto the live preview. Then, click to select the container and configure it using the settings in the left-hand menu.
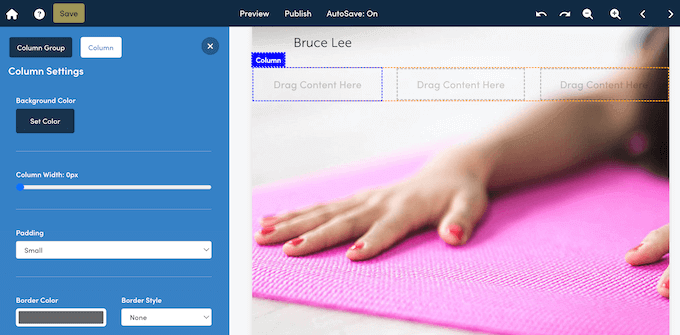

When you’re happy with how the container is set up, you can add cards to it using drag and drop. You can create some interesting layouts using Beacon’s containers, so it’s well worth experimenting with them.
Step 9: Publish Your Lead Magnet
When you’re happy with how the lead magnet looks, it’s time to make it live so you can start generating leads. To do that, click the ‘Publish’ button in the Beacon toolbar.
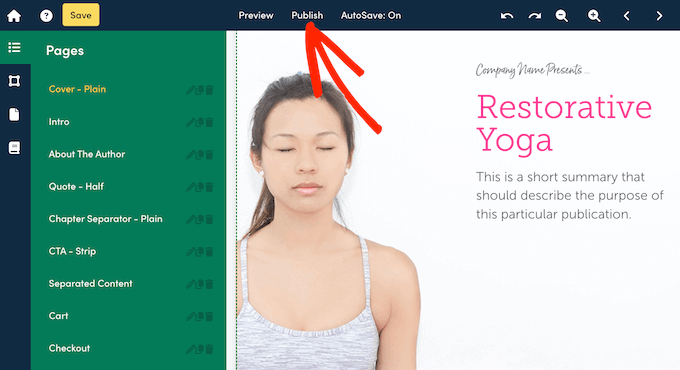

Beacon will now display all the different ways you can publish this resource.
Let’s run through them quickly, so you know exactly what your options are.
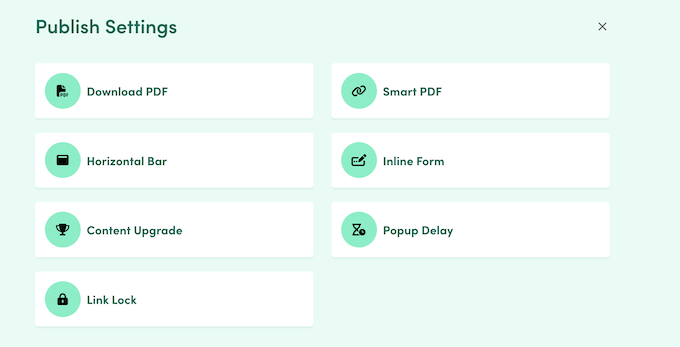

Download PDF
Sometimes, you may want to share a lead magnet via other channels besides your WordPress website or blog. For example, you might attach a lead magnet to your next email newsletter.
In that case, you can download the lead magnet as a PDF. Simply click on ‘Download PDF’ and then select ‘Generate PDF.’


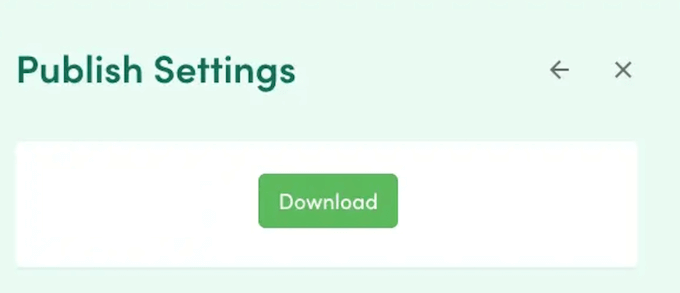
After a few moments, you’ll see a ‘Download’ button.
Simply give this button a click, and Beacon will download the lead magnet to your local computer, ready for you to share via any channel that supports PDFs.

Smart PDF
Beacon has a unique smart PDF option that lets visitors access the lead magnet directly in their web browser via a link. This works particularly well for mobile users since smart PDFs automatically resize to suit the visitor’s screen.
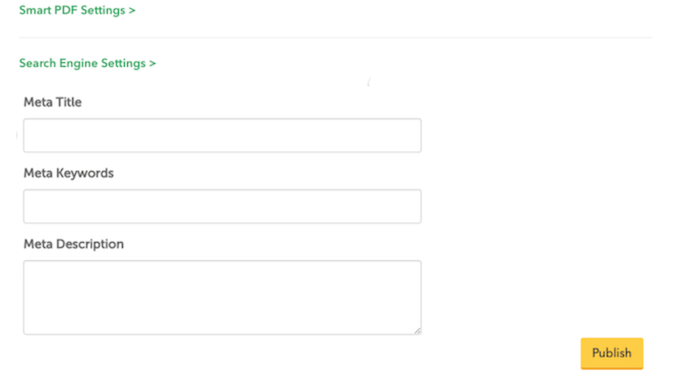
Search engines can also index smart PDFs, so they’re a great way to boost your WordPress SEO. In fact, Beacon has an entire area where you can add a meta title, keywords, and a description to your smart PDF.

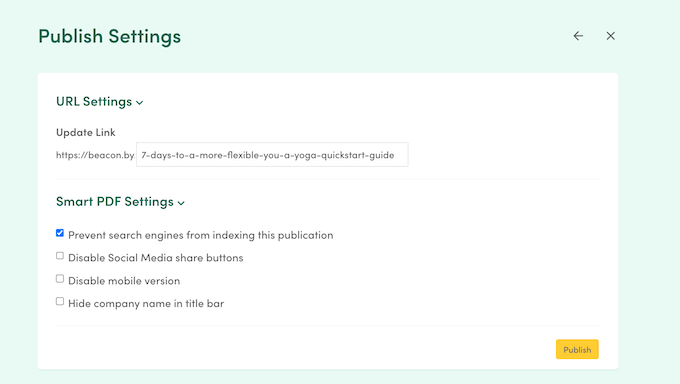
Finally, sharing your lead magnets as a smart PDF means that Beacon can track how people are interacting with it. This includes time spent reading the document and the source of any inbound links and traffic.
To publish your lead magnet, simply select the ‘Smart PDF’ option and then follow the clear onscreen instructions.

Horizontal Bar
Want to promote the lead magnet across multiple pages or even your entire WordPress website? Beacon lets you pin an eye-catching bar to the top or bottom of the browser window.


By default, this alert bar appears across every page of your site, but you can exclude specific URLs if you prefer.
To get started, simply select the ‘Horizontal Bar’ option and then choose the template you want to use.
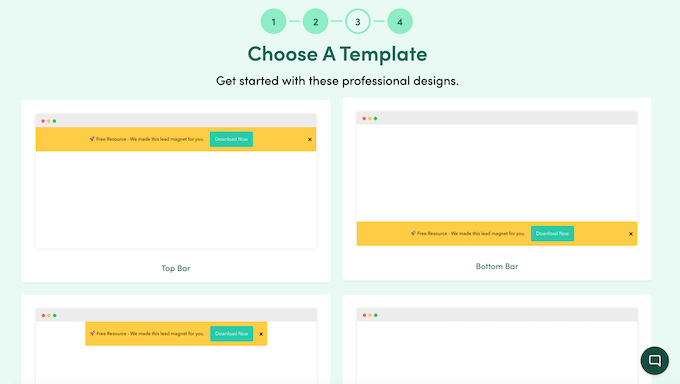

As always, these templates are fully customizable.
After choosing a design, you can change the layout and content using Beacon’s user-friendly drag-and-drop editor.
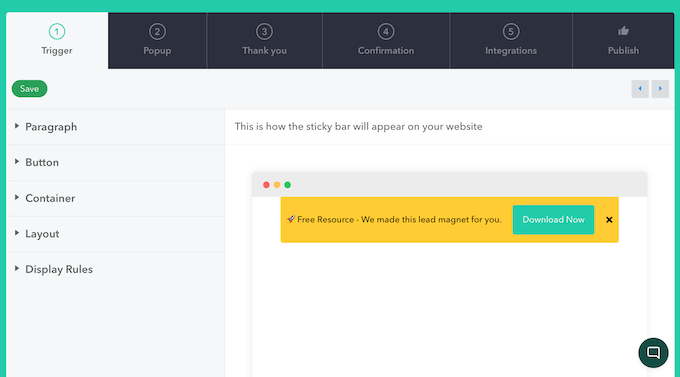

Inline Form
Want to create a lead capture form that integrates seamlessly with your content?
Beacon has a range of ready-made form templates that you can customize using its drag-and-drop editor.
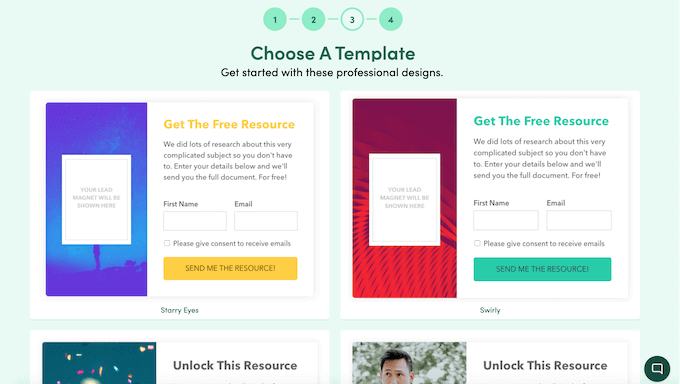

When you’re happy with how the lead capture form looks, you can add it to your site using custom code that Beacon creates automatically (we recommend using WPCode here).
With that said, inline forms are a good option if you want to control exactly where the form appears on your site. For example, you might place it on a landing page or midway through a particular blog post.
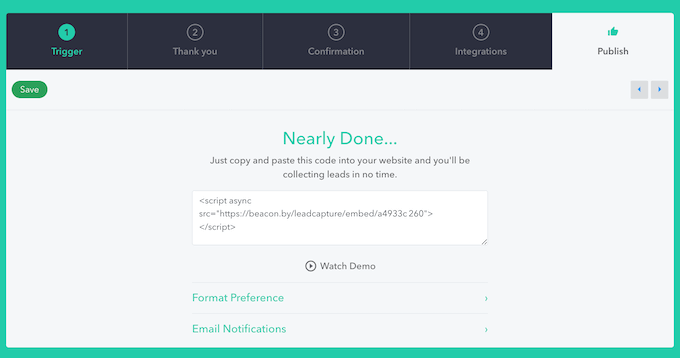

Since it integrates seamlessly with your site, this is also a good option if you don’t want to distract from the rest of your content.
Want to create an inline form? Then select the ‘Inline Form’ option and follow Beacon’s clear onscreen instructions.
Content Upgrade
A content upgrade is essentially a call to action button that you embed into your site’s content.


As you can see, content upgrades are usually pretty minimalistic, so they’re great if you don’t want to distract from the rest of the page.
When the visitor clicks a button, they’ll see a popup asking for their contact information.
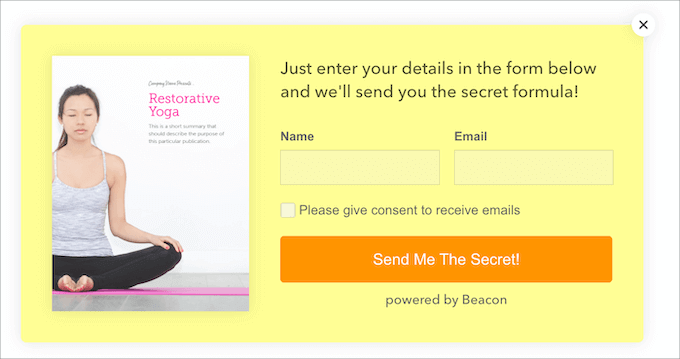

Since visitors need to click two separate buttons, content upgrades are a great way to encourage greater engagement.
Popup Delay
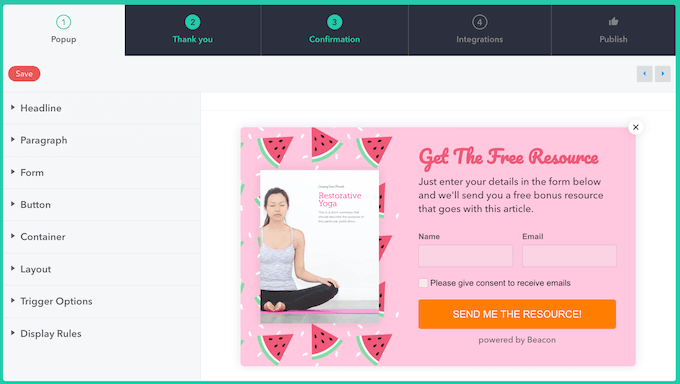
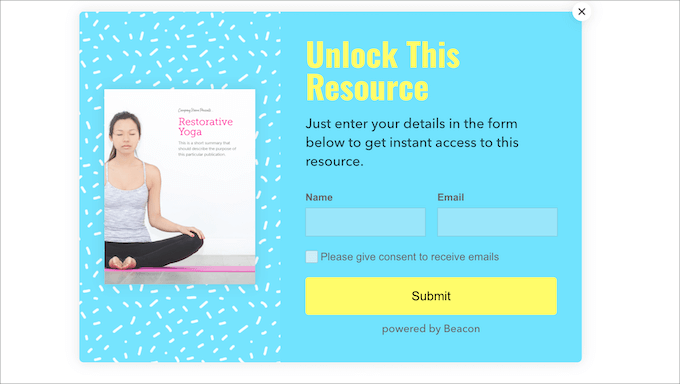
Want to really grab the visitor’s attention? Beacon can promote your lead magnet via a WordPress popup.
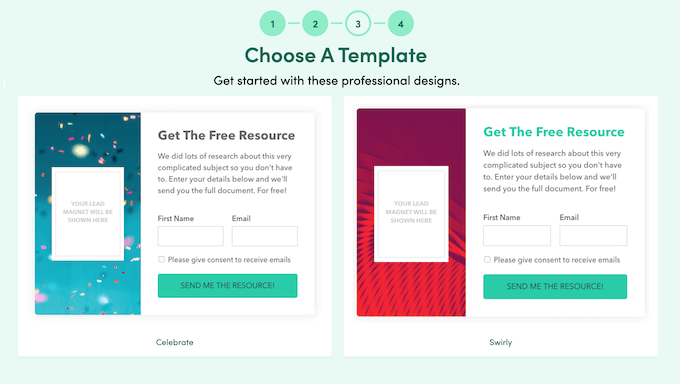

These popups are delayed, which means they only appear after the visitor scrolls down or spends a certain amount of time on the page. This gives them a chance to explore the rest of the content, before getting interrupted by a popup.
This technique works particularly well if the page’s content relates to the lead magnet in some way. If the visitor is already engaged with the current content, then they’re more likely to register for the lead magnet so they can learn more.
To create a delayed popup, select this option in the Beacon dashboard and then follow the onscreen instructions.

Link Lock
If you prefer not to use forms or popups, then Beacon can generate a direct download link for your lead magnet.
You can then add this link to any button, anchor text, image, or similar content. Alternatively, you can share the link on any platform that supports URLs, including social media sites. In fact, Beacon’s ‘link lock’ method works perfectly, even if you don’t have a blog or website.
When someone clicks this link, Beacon will ask for their email address in order to unlock the lead magnet. As soon as they enter this information, they can view and download your magnet.

Step 10. Build a Lead Magnet Library, Fast
You now know how to create effective lead magnets, but that’s just the beginning. Beacon can also convert existing blog posts into lead magnets. You can either import a single post into Beacon or import multiple posts and then combine them into the ultimate resource.
To make this even easier, Beacon has a dedicated WordPress plugin that can import your posts and pages with just a few clicks.
The first thing you need to do is install and activate the Beacon plugin. For more details, check out our guide on how to install a WordPress plugin.
With that done, go to Beacon » Create in the WordPress dashboard.
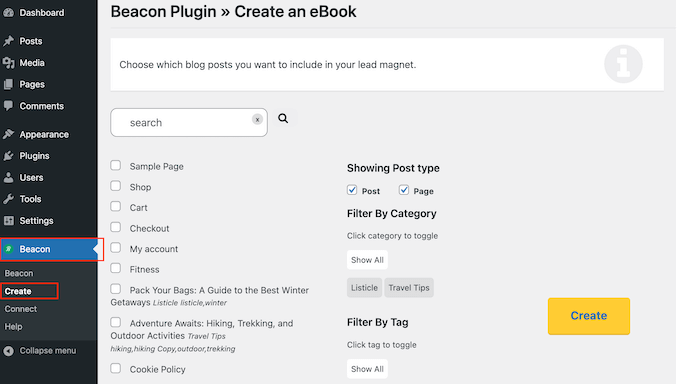

Now, Beacon will scan your site and display all the pages and posts it discovers.
You can filter this content by checking or unchecking the ‘Pages’ and ‘Posts’ boxes, or you can select specific categories and tags.


That done, simply find the blog post you want to use and then check its box.
Want to combine multiple posts into a longer lead magnet, such as an ebook? Then, simply select multiple checkboxes.
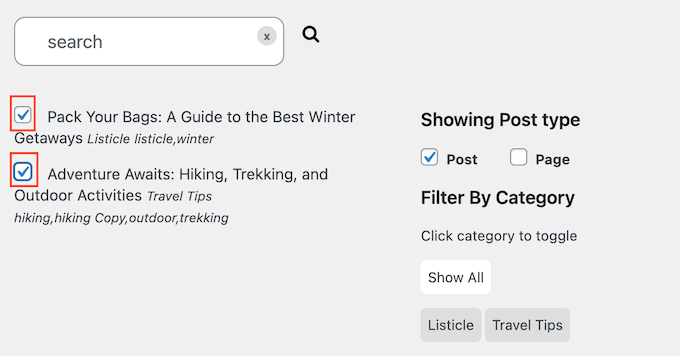

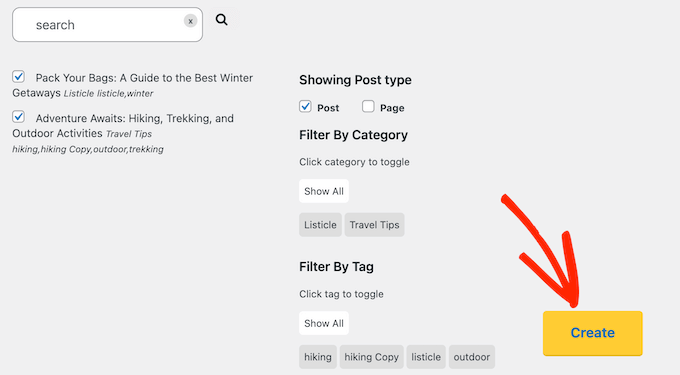
When you’re happy with your selection, click on the ‘Create’ button.
Beacon will now open in a new tab, with your content already imported. You can then follow the onscreen instructions to design and publish your lead magnet.

Bonus Tip: How to Generate Even More Leads
Once you have a library of beautifully designed, information-packed lead magnets, you’ll need a way to promote them.
If you’ve used Beacon to create inline forms, popups, horizontal bars, and similar lead capture content, then you’re off to a great start. However, there are lots more tools and plugins that you can use:
OptinMonster. This is one of the best popup plugins and lead generation tools for creating eye-catching popups, floating bars, scroll boxes, and more. OptinMonster integrates with all the major email service providers and comes with powerful features like exit-intent technology. This way, you can encourage users to download your lead magnet rather than leaving your website.
SeedProd. Want to create professionally designed landing pages so you can promote your latest lead magnets in style? SeedProd is a must-have plugin if you plan to use Beacon’s inline forms or content upgrades, as you can create custom pages that perfectly complement this content.
MonsterInsights. If you’re going to capture as many leads as possible, then you’ll need to know what’s working and what isn’t. MonsterInsights makes it easy to install Google Analytics in WordPress to see exactly where visitors are coming from and the actions they take on your site. You can then use this insight to increase your traffic and boost your conversion rates.
AIOSEO. More visitors means more potential leads. With that said, you’ll need a good SEO plugin to improve your search engine rankings and drive more people to your site. Since it’s the best SEO plugin on the market, we’re confident that AIOSEO is essential for getting more leads and conversions.
We hope this article helped you learn how to create a lead magnet that converts. You can also go through our guide on how to increase leads by 50% with interactive lead generation or check out our top tips for using AI to skyrocket your lead generation campaigns.
If you liked this article, then please subscribe to our YouTube Channel for WordPress video tutorials. You can also find us on Twitter and Facebook.

